
To get in a better mood I've decided to dye some eggs; it is Easter after all, even though it looks like
Christmas outside the window...
To get a deep colored eggs which are also tasty (nobody likes over boiled
eggs with grayish yolks), you must go for the multi-phased method: 1-creating the
dye, 2-boiling the eggs in the dye, 3-cooling the dye, 4-soaking the boiled
eggs in the dye.
Vinegar is
must, because it helps the natural dye adhere to the eggs. Normally when I make
hard-boiled eggs, I immediately plunge the boiled eggs into ice water to stop
the cooking process. I was afraid this would make some of the color come off,
so I skipped this step. Just note that your eggs may not be as perfectly boiled
as they normally would due to dyeing experimentation.

Ingredients:
lots of onion
skins (I start collecting them at least for a month ahead)
hibiscus tea (I used 2-3 tbsp for 1 liter water) next year I will try the red cabbage instead as it makes beautiful deep blue color)
hibiscus tea (I used 2-3 tbsp for 1 liter water) next year I will try the red cabbage instead as it makes beautiful deep blue color)
white
vinegar
extra large white eggs (cold, directly from the fridge)
extra large white eggs (cold, directly from the fridge)
rubber bands
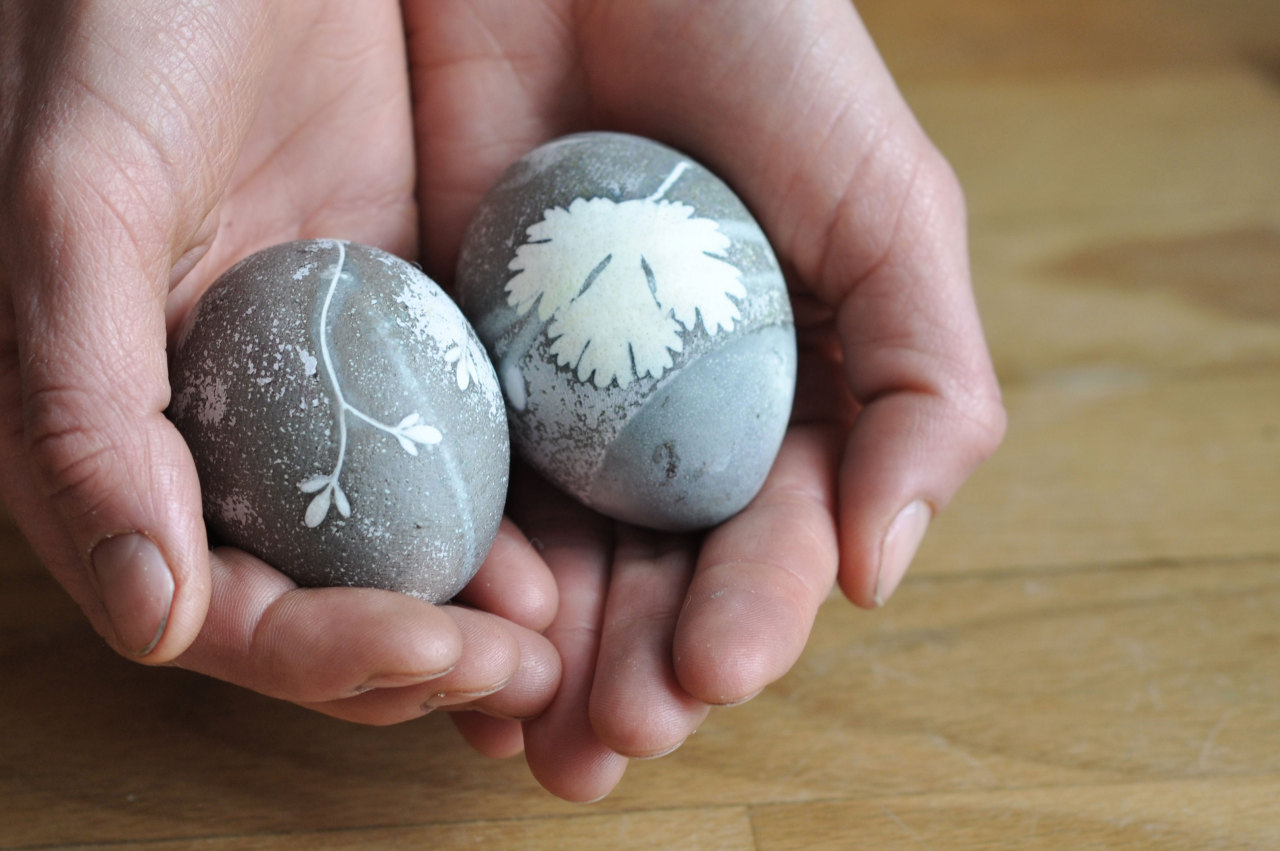
leaves (I
used cilantro and biter cress), small flowers, paper dots from the hole punch,
or whatever comes to your mind for decorating the eggs and making interesting
patterns
old pantyhose,
cut in pieces
Method:
1. Add the
onion skins or hibiscus flowers to a medium pot. Cover with enough water that
will later be able to cover the eggs. Add 1 tablespoon vinegar. Bring the
mixture to a boil, then turn down the heat and simmer for minimum 30 minutes. Turn off the heat and cool to room temperature.
2. Prepare
the eggs – wash them well with soap to make sure there is no grease left on their surface; place
leaves, flowers, paper dots on the egg as desired. Most materials will stick
better if you dip them in water first. Gently place the egg inside the hose,
make sure your design is still how you want it, and then pull the hose securely
it the back and secure with a rubber band. Trim the excess hose with scissors.

3. Once the dye mixture has cooled, remove the onion skins/hibiscus flowers and discard. Add the prepared eggs to the dye water. (The eggs should be completely covered by the dye. If not, add a bit more cold water to cover.) Add 2 tablespoons white vinegar. Bring the mixture to a boil over high heat. As soon as the water comes to boil, turn down the heat so that the water is just simmering, cover the pan, and simmer for 10 minutes. Remove the eggs to cool.
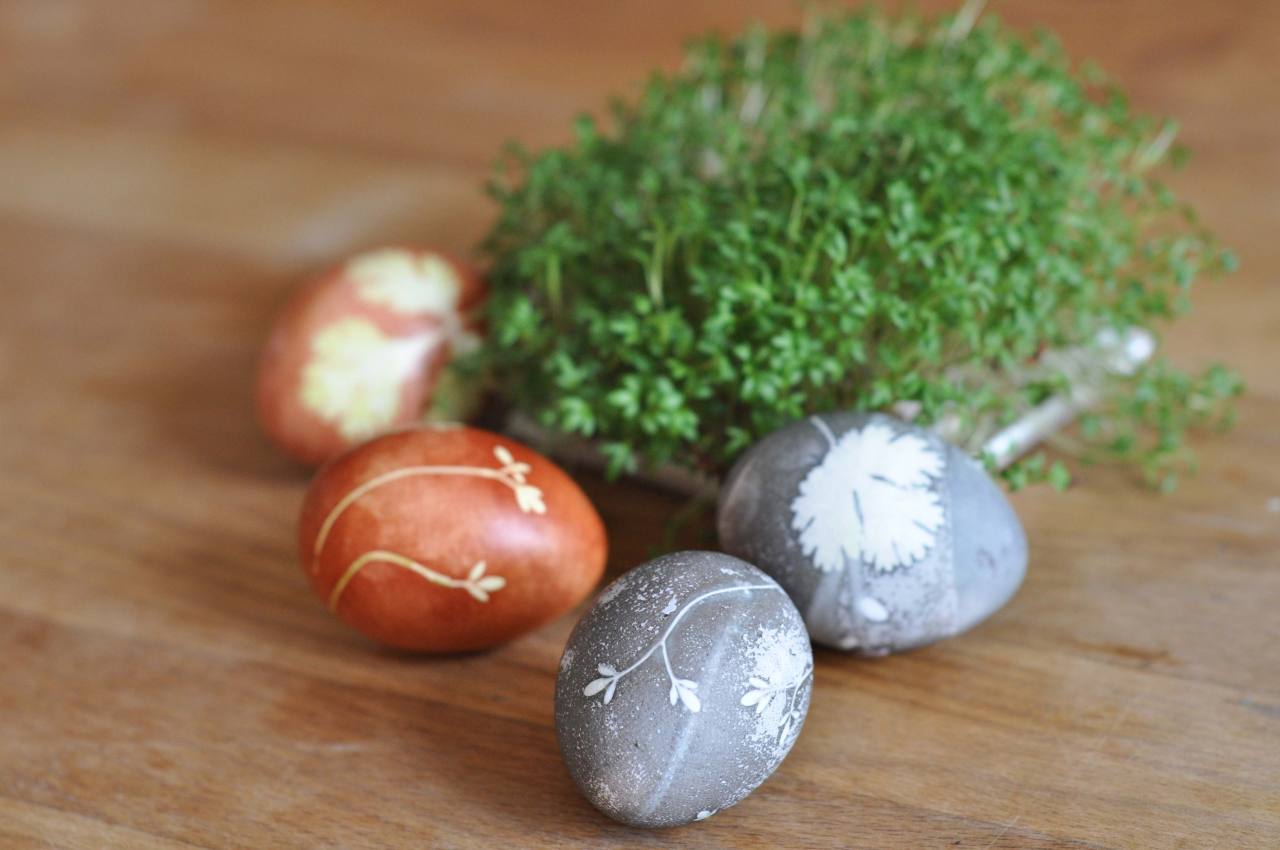
4. At this
point, you can leave the eggs as-is if you like their subtle color. Or, for
more vibrant hues, cool the dye water. Add the eggs back to the dye water
and let soak until they are the color you want. Remove carefully, leave to dry completely
than gently remove the hose and leaves. For a shiny, elegant look you can rub
some oil or butter into the shell. If you not planning to eat them same day, refrigerate.
Piekne! Te z pierwszego zdjecia wyjatkowo mnie zachwycily :)
ReplyDeletePozdrawiam serdecznie!
I radosnego swietowania zycze :)
(u nas tez niestety bardziej jesien niz wiosna za oknem...)
Dzieki Bea! To herbata z hibiscusa dala taki fajny vintage efekt! wzory z rzerzuchy i kolendry - tego co akurat bylo pod reka...
DeleteZrobilam tylko kilka jaj w tym roku i juz wszystkie zjedzone; w przyszlym roku bardziej poszaleje, koniecznie na niebiesko z czerwona kapusta!
Pozdrawiam swiatecznie!